
2 Server - REST API
source: categories/study/react_restapi_graphql/react_restapi_graphql3.md
2.1 express 서버 및 json database 만들기
이번 시간엔 server쪽을 구현해보겠습니다.
막상 구현해보시면 생각보다 너무 간단해서 깜짝 놀라실겁니다.
cd server
yarn init -y
yarn add express cors uuid
yarn add --dev nodemon
nodemon 파일이 변경되었을 때마다 서버를 재실행해주는 라이브러리입니다.
// server/package.json
{
  "name": "server",
  "version": "1.0.0",
  "main": "index.js",
  "license": "MIT",
  "dependencies": {
    "cors": "^2.8.5",
    "express": "^4.17.1",
    "uuid": "^8.3.2"
  },
  "devDependencies": {
    "nodemon": "^2.0.12"
  },
  "scripts": {
    "start": "nodemon ./src/index.js"
  }
}
root_folder/
|-- client/
|   |-- components/
|       `-- MsgInput.js
|       `-- MsgItem.js
|       `-- MsgList.js
|   |-- pages/
|       `-- _app.js
|       `-- index.js
|       `-- index.scss
|   `-- next.config.js
|   `-- package.json
|-- server/
|   `-- nodemon.json
|   `-- package.json
|-- package.json
nodemon.json 파일은 nodemon이 실행될 때, 어떤 것들을 감시해서 변경 사항을 반영할지,
그리고 어떤 것들은 변경되더라도 새로고침을 하지 않을지를 정하는 파일입니다.
그리고 환경정보도 설정할 수 있습니다.
// server/src/nodemon.json
{
  "watch": ["src"],
  "ignore": ["db/**/*"],
  "env": {
    "NODE_ENV": "development"
  }
}
root_folder/
|-- client/
|   |-- components/
|       `-- MsgInput.js
|       `-- MsgItem.js
|       `-- MsgList.js
|   |-- pages/
|       `-- _app.js
|       `-- index.js
|       `-- index.scss
|   `-- next.config.js
|   `-- package.json
|-- server/
|   |-- src/
|       |-- db/
|           `-- messages.json
|   `-- nodemon.json
|   `-- package.json
|-- package.json
messages.json 파일은.. 지난시간에 저희가 컴포넌트 만들면서 임의로 생성했던 목 데이터있죠?
걔네들을 그대로 복붙해서 json 형식으로 넣으면 될거같습니다.
yarn run client
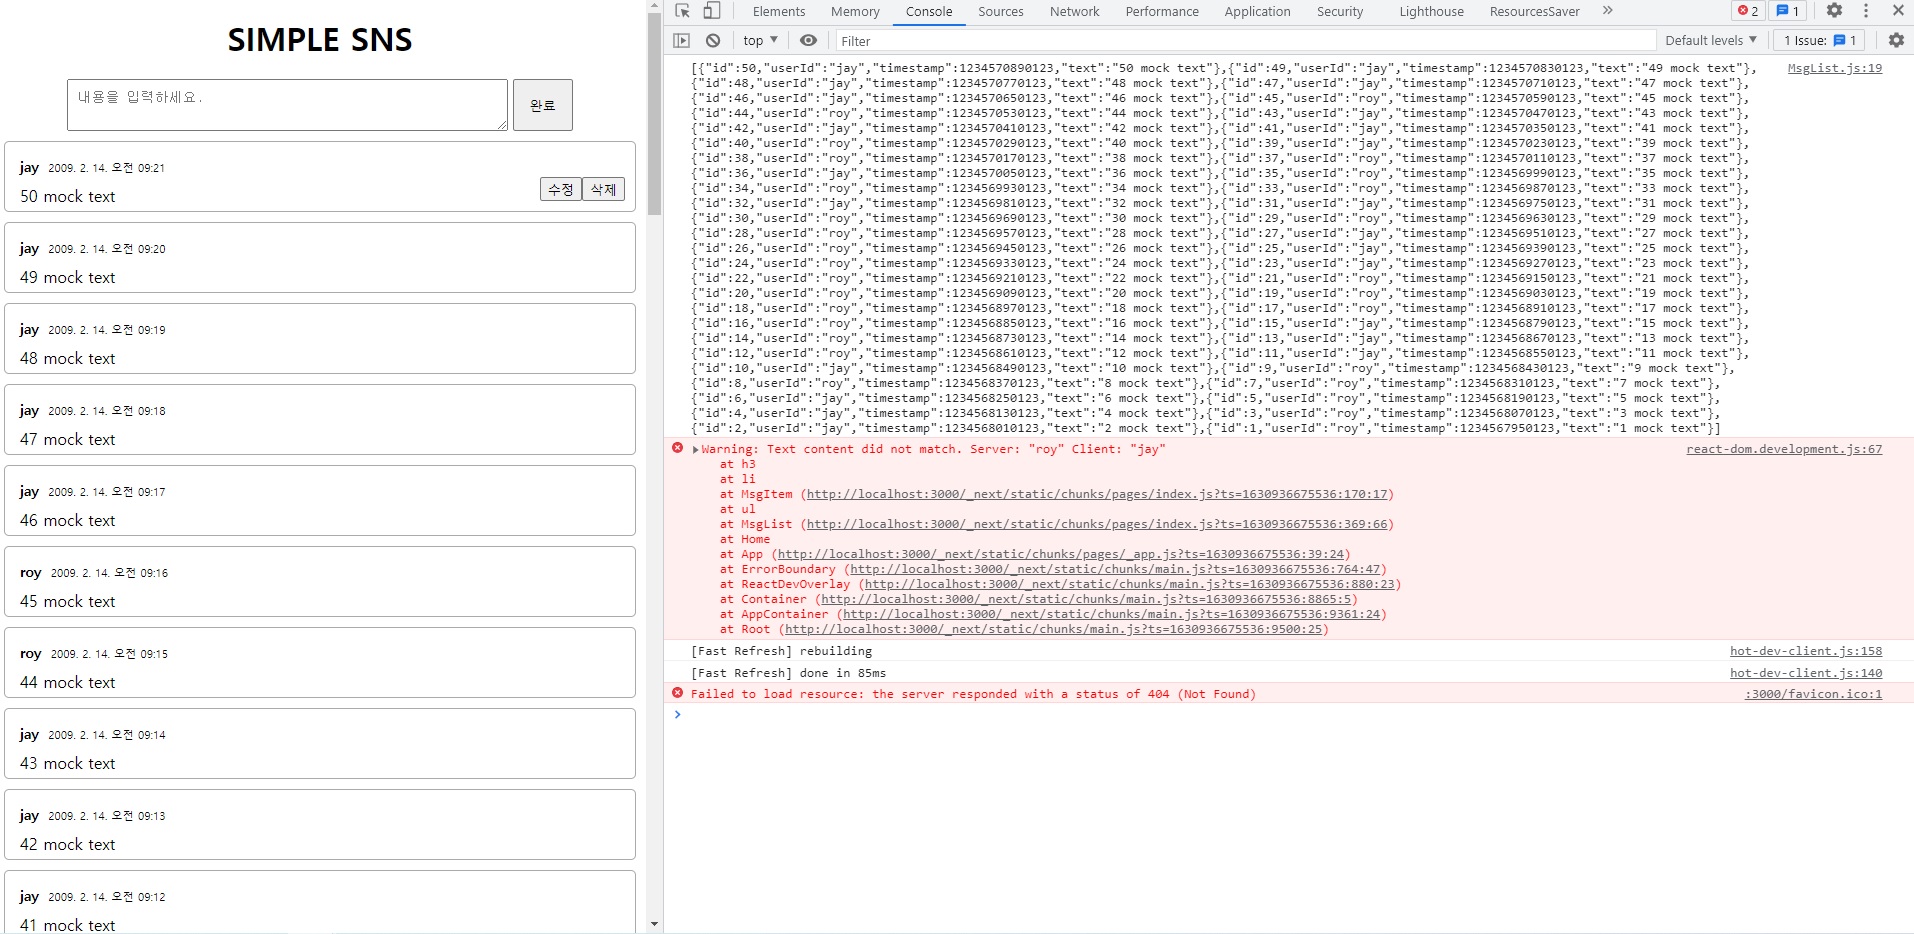
client를 띄워서 console로 출력한 다음에 그 결과를 들고오도록 합시다.
// client/components/MsgList.js
import MsgItem from "./MsgItem";
import MsgInput from "./MsgInput";
import {useState} from "react";

const UserIds = ['roy', 'jay'];
const getRandomUserId = () => UserIds[Math.round(Math.random())];

// 아래와 같이 배열 length가 50인 빈 배열을 만들어줍니다.
// 그리고 fill 메소드로 0값을 채워줍니다.
// fill 메소드로 값을 채워주기 전까진 map 메소드를 돌릴 수 없습니다.
const originalMsgs = Array(50).fill(0).map((_, i) => ({
    id: 50 - i,
    userId: getRandomUserId(),
    timestamp: 1234567890123 + (50 - i) * 1000 * 60, // 1분마다 하나씩
    text: `${50 - i} mock text`
}))

console.log(JSON.stringify(originalMsgs)); // 이렇게하면 복붙하기 더 편합니다.


// [
//     {
//         id: 1,
//         userId: getRandomUserId(),
//         timestamp: 1234567890123,
//         text: "1 mock text"
//     }
// ]

const MsgList = () => {
    const [msgs, setMsgs] = useState(originalMsgs);
    const [editingId, setEditingId] = useState(null);
    const onCreate = text => {
        const newMsg = {
            id: msgs.length + 1,
            userId: getRandomUserId(),
            timestamp: Date.now(),
            text: `${msgs.length + 1} ${text}`,
        }
        setMsgs(msgs => ([newMsg, ...msgs]))
    }

    // 바뀐 text값, 그리고 어떤 text인지 알기위해서 id 값도 받아야합니다.
    const onUpdate = (text, id) => {
        // 아래처럼 state 안에서 기존 데이터를 받아오게끔하면 좀 더 안정적입니다.
        // 그래서 setState를 아래처럼 함수형으로 사용하는 것을 추천한다고합니다.
        setMsgs(msgs => {
            const targetIndex = msgs.findIndex(msg => msg.id === id);
            // findindex로 일치하는 값이 없으면 -1 반환
            if (targetIndex < 0) return msgs;
            const newMsgs = [...msgs]
            newMsgs.splice(targetIndex, 1, {
                ...msgs[targetIndex], // 기존 속성들을 받아오고,
                text // text만 새걸로 업데이트해주면된다.
            })
            return newMsgs;
        })
        doneEdit();
    }

    // delete는 text가 필요없고 id만 있으면됩니다.
    const onDelete = (id) => {
        setMsgs(msgs => {
            const targetIndex = msgs.findIndex(msg => msg.id === id);
            // findindex로 일치하는 값이 없으면 -1 반환
            if (targetIndex < 0) return msgs;
            const newMsgs = [...msgs]
            newMsgs.splice(targetIndex, 1) // update와의 차이점, splice를 해준 다음에 그 자리에 새로운 값을 안 넣어주면된다.
            return newMsgs;
        })
    }

    // update가 완료되었다는 것을 알려줍니다.
    const doneEdit = () => setEditingId(null)

    return (
        <>
            <MsgInput mutate={onCreate}/>
            <ul className='messages'>
                {
                    msgs.map(x => <MsgItem key={x.id}
                                           {...x}
                                           onUpdate={onUpdate}
                                           onDelete={() => onDelete(x.id)} // onDelete가 실행될 때 id가 넘어와야하므로 왼쪽과 같이 작성해준다.
                                           startEdit={() => setEditingId(x.id)} // setEditingId가 실행될 때 id가 넘어와야하므로 왼쪽과 같이 작성해준다.
                                           isEditing={editingId === x.id}
                    />)
                }
            </ul>
        </>
    )
}

export default MsgList;
위의 console창에 뜬 것을 그대로 복사해서
// server/src/db/messages.json
[
  {
    "id": 50,
    "userId": "jay",
    "timestamp": 1234570890123,
    "text": "50 mock text"
  },
  {
    "id": 49,
    "userId": "jay",
    "timestamp": 1234570830123,
    "text": "49 mock text"
  },
  {
    "id": 48,
    "userId": "jay",
    "timestamp": 1234570770123,
    "text": "48 mock text"
  },
  {
    "id": 47,
    "userId": "jay",
    "timestamp": 1234570710123,
    "text": "47 mock text"
  },
  {
    "id": 46,
    "userId": "jay",
    "timestamp": 1234570650123,
    "text": "46 mock text"
  },
  {
    "id": 45,
    "userId": "roy",
    "timestamp": 1234570590123,
    "text": "45 mock text"
  },
  {
    "id": 44,
    "userId": "roy",
    "timestamp": 1234570530123,
    "text": "44 mock text"
  },
  {
    "id": 43,
    "userId": "jay",
    "timestamp": 1234570470123,
    "text": "43 mock text"
  },
  {
    "id": 42,
    "userId": "jay",
    "timestamp": 1234570410123,
    "text": "42 mock text"
  },
  {
    "id": 41,
    "userId": "jay",
    "timestamp": 1234570350123,
    "text": "41 mock text"
  },
  {
    "id": 40,
    "userId": "roy",
    "timestamp": 1234570290123,
    "text": "40 mock text"
  },
  {
    "id": 39,
    "userId": "jay",
    "timestamp": 1234570230123,
    "text": "39 mock text"
  },
  {
    "id": 38,
    "userId": "roy",
    "timestamp": 1234570170123,
    "text": "38 mock text"
  },
  {
    "id": 37,
    "userId": "roy",
    "timestamp": 1234570110123,
    "text": "37 mock text"
  },
  {
    "id": 36,
    "userId": "jay",
    "timestamp": 1234570050123,
    "text": "36 mock text"
  },
  {
    "id": 35,
    "userId": "roy",
    "timestamp": 1234569990123,
    "text": "35 mock text"
  },
  {
    "id": 34,
    "userId": "roy",
    "timestamp": 1234569930123,
    "text": "34 mock text"
  },
  {
    "id": 33,
    "userId": "roy",
    "timestamp": 1234569870123,
    "text": "33 mock text"
  },
  {
    "id": 32,
    "userId": "jay",
    "timestamp": 1234569810123,
    "text": "32 mock text"
  },
  {
    "id": 31,
    "userId": "jay",
    "timestamp": 1234569750123,
    "text": "31 mock text"
  },
  {
    "id": 30,
    "userId": "roy",
    "timestamp": 1234569690123,
    "text": "30 mock text"
  },
  {
    "id": 29,
    "userId": "roy",
    "timestamp": 1234569630123,
    "text": "29 mock text"
  },
  {
    "id": 28,
    "userId": "roy",
    "timestamp": 1234569570123,
    "text": "28 mock text"
  },
  {
    "id": 27,
    "userId": "jay",
    "timestamp": 1234569510123,
    "text": "27 mock text"
  },
  {
    "id": 26,
    "userId": "roy",
    "timestamp": 1234569450123,
    "text": "26 mock text"
  },
  {
    "id": 25,
    "userId": "jay",
    "timestamp": 1234569390123,
    "text": "25 mock text"
  },
  {
    "id": 24,
    "userId": "roy",
    "timestamp": 1234569330123,
    "text": "24 mock text"
  },
  {
    "id": 23,
    "userId": "jay",
    "timestamp": 1234569270123,
    "text": "23 mock text"
  },
  {
    "id": 22,
    "userId": "roy",
    "timestamp": 1234569210123,
    "text": "22 mock text"
  },
  {
    "id": 21,
    "userId": "roy",
    "timestamp": 1234569150123,
    "text": "21 mock text"
  },
  {
    "id": 20,
    "userId": "roy",
    "timestamp": 1234569090123,
    "text": "20 mock text"
  },
  {
    "id": 19,
    "userId": "roy",
    "timestamp": 1234569030123,
    "text": "19 mock text"
  },
  {
    "id": 18,
    "userId": "roy",
    "timestamp": 1234568970123,
    "text": "18 mock text"
  },
  {
    "id": 17,
    "userId": "roy",
    "timestamp": 1234568910123,
    "text": "17 mock text"
  },
  {
    "id": 16,
    "userId": "roy",
    "timestamp": 1234568850123,
    "text": "16 mock text"
  },
  {
    "id": 15,
    "userId": "jay",
    "timestamp": 1234568790123,
    "text": "15 mock text"
  },
  {
    "id": 14,
    "userId": "roy",
    "timestamp": 1234568730123,
    "text": "14 mock text"
  },
  {
    "id": 13,
    "userId": "jay",
    "timestamp": 1234568670123,
    "text": "13 mock text"
  },
  {
    "id": 12,
    "userId": "roy",
    "timestamp": 1234568610123,
    "text": "12 mock text"
  },
  {
    "id": 11,
    "userId": "jay",
    "timestamp": 1234568550123,
    "text": "11 mock text"
  },
  {
    "id": 10,
    "userId": "jay",
    "timestamp": 1234568490123,
    "text": "10 mock text"
  },
  {
    "id": 9,
    "userId": "roy",
    "timestamp": 1234568430123,
    "text": "9 mock text"
  },
  {
    "id": 8,
    "userId": "roy",
    "timestamp": 1234568370123,
    "text": "8 mock text"
  },
  {
    "id": 7,
    "userId": "roy",
    "timestamp": 1234568310123,
    "text": "7 mock text"
  },
  {
    "id": 6,
    "userId": "jay",
    "timestamp": 1234568250123,
    "text": "6 mock text"
  },
  {
    "id": 5,
    "userId": "roy",
    "timestamp": 1234568190123,
    "text": "5 mock text"
  },
  {
    "id": 4,
    "userId": "jay",
    "timestamp": 1234568130123,
    "text": "4 mock text"
  },
  {
    "id": 3,
    "userId": "roy",
    "timestamp": 1234568070123,
    "text": "3 mock text"
  },
  {
    "id": 2,
    "userId": "jay",
    "timestamp": 1234568010123,
    "text": "2 mock text"
  },
  {
    "id": 1,
    "userId": "roy",
    "timestamp": 1234567950123,
    "text": "1 mock text"
  }
]
root_folder/
|-- client/
|   |-- components/
|       `-- MsgInput.js
|       `-- MsgItem.js
|       `-- MsgList.js
|   |-- pages/
|       `-- _app.js
|       `-- index.js
|       `-- index.scss
|   `-- next.config.js
|   `-- package.json
|-- server/
|   |-- src/
|       |-- db/
|           `-- messages.json
|           `-- user.json
|   `-- nodemon.json
|   `-- package.json
|-- package.json
// server/src/db/user.json
{
  "roy": {"id": "roy", "nickname": "로이"},
  "jay": {"id": "jay", "nickname": "제이"}
}
위 만들어놓은 데이터베이스에 Create, Update, Delete 기능을 모두 넣을 것입니다.
그러기 위해서 json을 읽어오고 다시 덮어씌우는 형식의 DB 컨트롤을 할겁니다.
root_folder/
|-- client/
|   |-- components/
|       `-- MsgInput.js
|       `-- MsgItem.js
|       `-- MsgList.js
|   |-- pages/
|       `-- _app.js
|       `-- index.js
|       `-- index.scss
|   `-- next.config.js
|   `-- package.json
|-- server/
|   |-- src/
|       |-- db/
|           `-- messages.json
|           `-- user.json
|       `-- dbController.js
|   `-- nodemon.json
|   `-- package.json
|-- package.json
// server/src/dbController.js
import fs from 'fs';
import {resolve} from 'path';

const basePath = resolve(); // 경로 세그먼트가 전달되지 않으면(경로형태의 인자값이 전달되지 않으면)
                            // path.resolve()는 현재 작업 디렉토리의 절대 경로를 반환합니다.
                            // D:\react-study2 경로 반환
console.log(basePath);

// filenames는 방금 만들어놓은 데이터베이스를 바라보게하겠습니다.
const filenames = {
    messages: resolve(basePath, 'src/db/messages.json'), // D:\react-study2\src\db\messages.json 경로 반환
                                                         // 흠.. 정확한 경로는 D:\react-study2\server\src\db\messages.json 이건데.. 뭐지..
    users: resolve(basePath, 'src/db/user.json')
}

// 이제 파일을 write하고 read하는 기능을 구현하면됩니다.

// 아래가 읽어오기 기능입니다.
export const readDB = target => {
    try {
        // 인코딩을 하지 않으면 파일이 깨져서 보일 수도 있습니다.
        // JSON 파일은 JSON 형태로 읽어올테니 JavaScript로 인식될 수 있게 JSON.parse()를 해줍니다.
        return JSON.parse(fs.readFileSync(filenames[target], 'utf-8'))
    } catch (err) {
        console.error(err);
    }
}

// 쓰기 기능입니다.
export const writeDB = (target, data) => {
    try {
        // data는 자바스크립트 문법으로 들어올테니깐 JSON.stringify()로 json 형태로 변형해준다.
        return fs.writeFileSync(filenames[target], JSON.stringify(data))
    } catch (err) {
        console.error(err)
    }
}
이 dbController.js를 활용해서 각각의 어떤 Route 요청이 들어올 때마다 read를 할지 write를 할지를 결정해주면 됩니다.
그리고 그때 messages를 불러올지 user를 불러올지 정해주면 되겠습니다.
그리고 다시 server/package.json.
빠트린 것이 있습니다.
노드JS 환경에서는 기본적으로 자바스크립트 ES6+에서 제공하는 모듈문법(import/export)을 사용할 수 없습니다.
기본적으로 const fs = require('fs') 이런식으로 써야합니다.
그런데 그러지않고 자바스크립트 ES6+ 모듈 문법을 사용하려면 package.json에서 다음과 같은 내용을 추가해주셔야합니다.
아래와 같이 추가해주시면 노드JS 환경에서 자바스크립트 ES6+ 모듈 문법을 사용하실 수 있게됩니다.
// server/package.json
{
  "name": "server",
  "type": "module",
  "version": "1.0.0",
  "main": "index.js",
  "license": "MIT",
  "dependencies": {
    "cors": "^2.8.5",
    "express": "^4.17.1",
    "uuid": "^8.3.2"
  },
  "devDependencies": {
    "nodemon": "^2.0.12"
  },
  "scripts": {
    "start": "nodemon ./src/index.js"
  }
}
2.2 routes 정의
root_folder/
|-- client/
|   |-- components/
|       `-- MsgInput.js
|       `-- MsgItem.js
|       `-- MsgList.js
|   |-- pages/
|       `-- _app.js
|       `-- index.js
|       `-- index.scss
|   `-- next.config.js
|   `-- package.json
|-- server/
|   |-- src/
|       |-- db/
|           `-- messages.json
|           `-- user.json
|       `-- dbController.js
|       `-- index.js
|   `-- nodemon.json
|   `-- package.json
|-- package.json
server/src/index.js엔 express app을 띄우기위한 모든 기능들이 들어갑니다.
// server/src/index.js
import express from 'express'
import cors from 'cors'

const app = express();
app.use(express.urlencoded({extended: true}))
app.use(express.json()) // express에서 json 형태로 사용하겠다.
app.use(cors({
    origin: 'http://localhost:3000', // 클라이언트 서버
    credentials: true,
}))

// 서버 경로는 8000번
app.listen(8000, () => {
    console.log('server listening on 8000...')
})
// server/package.json
{
  "name": "server",
  "type": "module",
  "version": "1.0.0",
  "main": "index.js",
  "license": "MIT",
  "dependencies": {
    "cors": "^2.8.5",
    "express": "^4.17.1",
    "uuid": "^8.3.2"
  },
  "devDependencies": {
    "nodemon": "^2.0.12"
  },
  "scripts": {
    "start": "nodemon ./src/index.js"
  }
}
server/package.json 파일의 scripts에 start 명령어에 nodemon이 ./src/index.js를 실행하도록 설정해놨었습니다.
이 명령어를 통해 express가 실행이되고, 그때 로컬호스트 8000번을 구동을 하는 상태가됩니다.
// 루트폴더/package.json
{
  "name": "react-study2",
  "version": "1.0.0",
  "main": "index.js",
  "license": "MIT",
  "private": true,
  "workspaces": [
    "client",
    "server"
  ],
  "scripts": {
    "client": "yarn workspace client start",
    "server": "yarn workspace server start"
  }
}
yarn run server

yarn run v1.22.10
$ yarn workspace server start
$ nodemon ./src/index.js
[nodemon] 2.0.12
[nodemon] to restart at any time, enter `rs`
[nodemon] watching path(s): src\**\*
[nodemon] watching extensions: js,mjs,json
[nodemon] starting `node ./src/index.js`
server listening on 8000...
위 명령어를 실행하면 workspace의 server start 명령어가 실행되면서 server/package.json의 start 명령어가 실행됩니다.
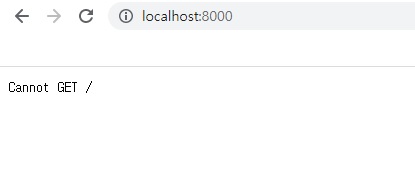
localhost:8000으로 접속하시면 위와 같이 Cannot GET /라는 메시지가 뜹니다.
엇 에러가 난거아니냐! 라고 생각하실 수도 있는데, 그렇지 않습니다.
이 부분이 뭐냐면,
localhost:8000 서버에 / 요청을 보냈는데 현재 / 요청(GET 요청)에 대한 라우터 정의가 되어있지 않기 때문에 GET으로 정보를 가져올 수 없다 라는 에러 메시지를 띄운겁니다.
// server/src/index.js
import express from 'express'
import cors from 'cors'

const app = express();
app.use(express.urlencoded({extended: true}))
app.use(express.json()) // express에서 json 형태로 사용하겠다.
app.use(cors({
    origin: 'http://localhost:3000', // 클라이언트 서버
    credentials: true,
}))

app.get('/', (req, res) => {
    res.send('ok');
})

// 서버 경로는 8000번
app.listen(8000, () => {
    console.log('server listening on 8000...')
})
만약에 위와 같이 되어있다고 한다면,
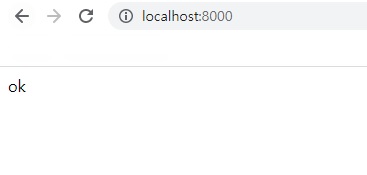
위와 같이 ok가 뜨게됩니다.
즉, 아래와 같이도 작성해나갈 수 있습니다.
// server/src/index.js
import express from 'express'
import cors from 'cors'

const app = express();
app.use(express.urlencoded({extended: true}))
app.use(express.json()) // express에서 json 형태로 사용하겠다.
app.use(cors({
    origin: 'http://localhost:3000', // 클라이언트 서버
    credentials: true,
}))

app.get('/', (req, res) => {
    res.send('ok');
})

app.post('/messages', (req, res) => {
    // ...
})

app.put('/messages/:id', (req, res) => {
    // ...
})

app.delete(
    // ...
)

// 서버 경로는 8000번
app.listen(8000, () => {
    console.log('server listening on 8000...')
})
위와 같이 다 똑같은 형태로 되어있습니다.
app[method](route, handler)
위와 같은 형태로 구현을 해주시면 되는겁니다.
하나하나의 route 각각이 api 명령어가 되는겁니다.
위 내용은 파일에서 지우시고, 지금부터 위 내용을 제대로 구현해보도록 하겠습니다.
root_folder/
|-- client/
|   |-- components/
|       `-- MsgInput.js
|       `-- MsgItem.js
|       `-- MsgList.js
|   |-- pages/
|       `-- _app.js
|       `-- index.js
|       `-- index.scss
|   `-- next.config.js
|   `-- package.json
|-- server/
|   |-- src/
|       |-- db/
|           `-- messages.json
|           `-- user.json
|       |-- routes/
|           `-- messages.js
|       `-- dbController.js
|       `-- index.js
|   `-- nodemon.json
|   `-- package.json
|-- package.json
GET
// server/src/routes/messages.js
import {readDB} from "../dbController";

const messagesRoute = [
    { // GET MESSAGES : 전체 메시지를 가져오는 명령
        method: 'get',
        route: '/messages',
        handler: (req, res) => {
            const msgs = readDB('messages')
            res.send(msgs)
        }
    },
    { // CREATE MESSAGE
        method: 'post',
        route: '/messages',
        handler: (req, res) => {
            res.send()
        }
    },
    { // UPDATE MESSAGE
        method: 'put',
        route: '/messages/:id',
        handler: (req, res) => {
            res.send()
        }
    },
    { // DELETE MESSAGE
        method: 'delete',
        route: '/messages/:id',
        handler: (req, res) => {
            res.send()
        }
    },
]

export default messagesRoute
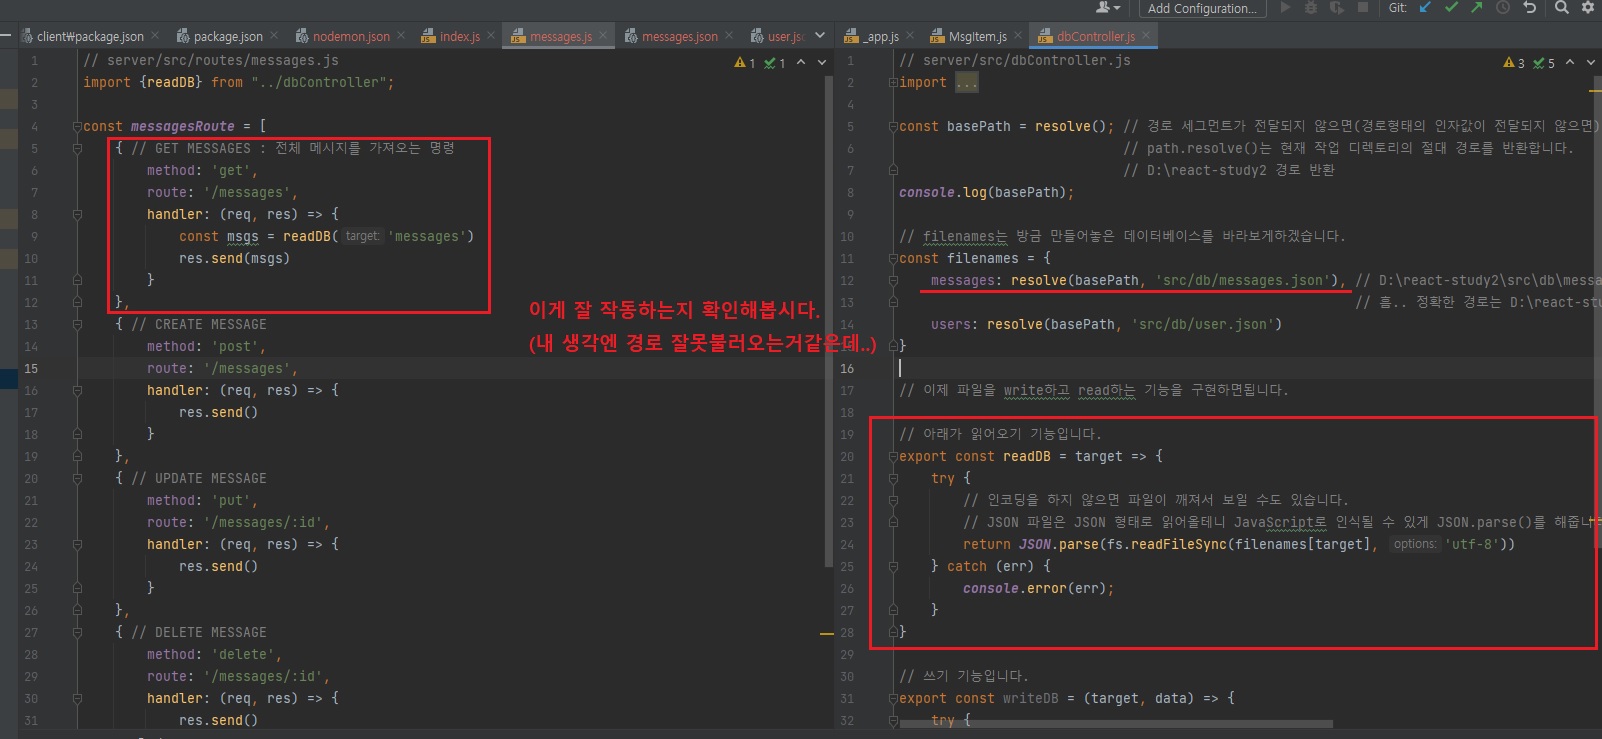
server/src/routes/messages.js 파일에서 GET MESSAGES가 잘 작동하는지 확인해봅시다.
// server/src/index.js
import express from 'express'
import cors from 'cors'
import messagesRoute from "./routes/messages";

const app = express();
app.use(express.urlencoded({extended: true}))
app.use(express.json()) // express에서 json 형태로 사용하겠다.
app.use(cors({
    origin: 'http://localhost:3000', // 클라이언트 서버
    credentials: true,
}))

messagesRoute.forEach(({method, route, handler}) => {
    app[method](route, handler)
})

// 서버 경로는 8000번
app.listen(8000, () => {
    console.log('server listening on 8000...')
})
위와 같이 작성하면 아래와 같은 에러가 발생한다.
yarn run server

...
Error [ERR_MODULE_NOT_FOUND]: Cannot find module 'D:\react-study2\server\src\routes\messages' imported from D:\react-study2\server\src\index.js
    at finalizeResolution (internal/modules/esm/resolve.js:276:11)
    at moduleResolve (internal/modules/esm/resolve.js:699:10)
    at Loader.defaultResolve [as _resolve] (internal/modules/esm/resolve.js:810:11)
    at Loader.resolve (internal/modules/esm/loader.js:88:40)
    at Loader.getModuleJob (internal/modules/esm/loader.js:241:28)
    at ModuleWrap.<anonymous> (internal/modules/esm/module_job.js:56:40)
    at link (internal/modules/esm/module_job.js:55:36) {
  code: 'ERR_MODULE_NOT_FOUND'
}
[nodemon] app crashed - waiting for file changes before starting...
이땐,
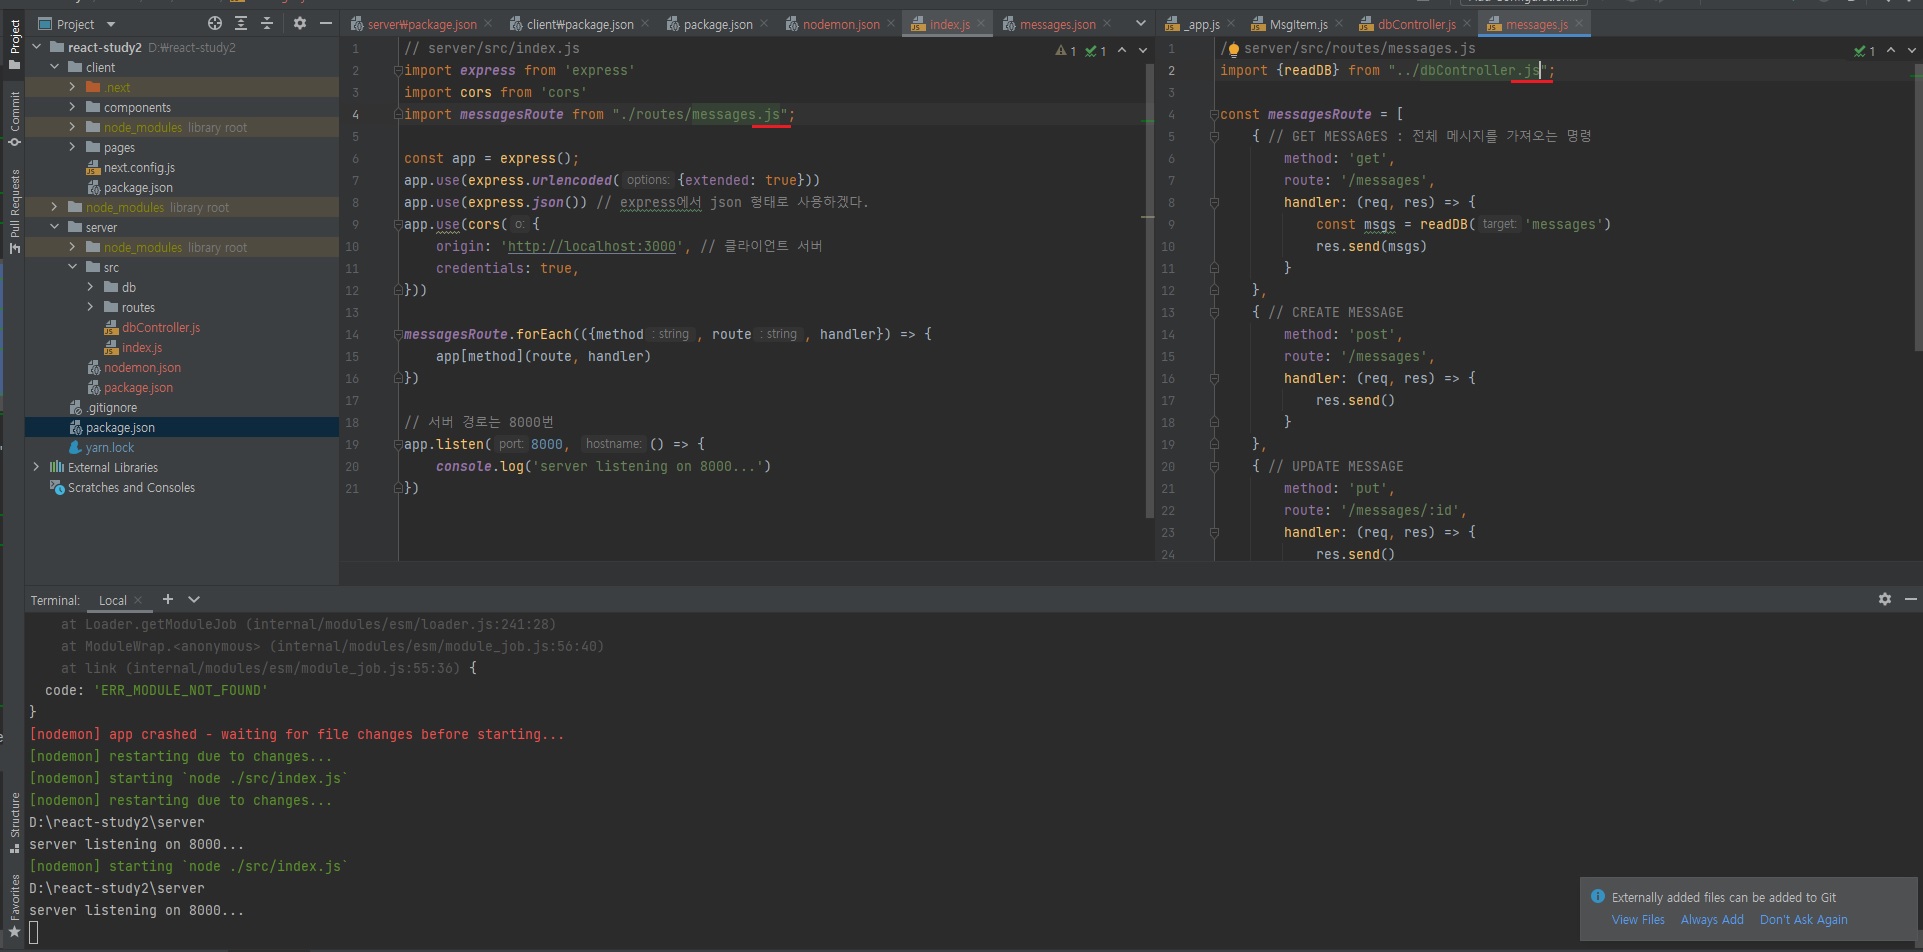
위와 같이 개발자가 만든 파일엔 .js를 붙여주어 해결하면된다.


오잉. yarn run server 명령어로 실행했을 땐 D:\react-study2\server 경로로 잡히네..
흐음 이땐 server/package.json의 scripts의 start 명령어에 정의되어있는 명령어가 실행되게되므로 그 명령어가 정의되어있는server/package.json이 기준이되는건가.. 그래서 server 폴더까지 경로로 제대로 잡히는건가..?
node server/src/dbController.js
위 명령어로 실행하면 D:\react-study2 이렇게 경로가 잡힌다.
이건 그냥 react-study2 즉, 루트 폴더에서 실행하다보니 루트 폴더만 잡히는 거 같다.
여튼 위와 같이 JSON 형태 데이터가 전부 들어오는 것을 확인할 수 있습니다.
GET에 대해선 이렇게 url로 바로 접근해서 직접적으로 확인할 수 있습니다.
POST에 대해서도 만들어보죠.
POST
// server/src/routes/messages.js
import {v4} from "uuid";
import {readDB, writeDB} from "../dbController.js";

const getMsgs = () => readDB('messages') // 중복을 방지하기위한 코드입니다.
const setMsgs = data => writeDB('messages', data) // 중복을 방지하기위한 코드입니다.
const messagesRoute = [
    { // GET MESSAGES : 전체 메시지를 가져오는 명령
        method: 'get',
        route: '/messages',
        handler: (req, res) => {
            // const msgs = readDB('messages') // 이거는 똑같이 다 들어갑니다. 다 똑같으니까 이거를 함수로 바꿔봅시다.
            const msgs = getMsgs();
            res.send(msgs)
        }
    },
    { // CREATE MESSAGE
        method: 'post',
        route: '/messages',
        // POST는 새글을 등록하는겁니다.
        // 첫번째(request) 인자에는 body, params, query가 있습니다. 그 중에서 body를 사용하게됩니다.
        // body는 새글이 등록된 text가 들어있을거고 그리고 userId도 들어있습니다.
        handler: ({body}, res) => {
            // const msgs = readDB('messages') // 이거는 똑같이 다 들어갑니다.
            const msgs = getMsgs();
            const newMsg = {
                id: v4(), // uuid의 v4 버전의 id를 만들겠다는 뜻입니다.
                text: body.text,
                userId: body.userId,
                timestamp: Date.now(),
            }
            msgs.unshift(newMsg) // 새글을 배열의 제일 앞에 넣어줍니다.
            // writeDB('messages', msgs) // 그리고 DB에 기록합니다. // 이 코드도 자주 사용하므로 위에 함수로 뺍니다.
            setMsgs();
            res.send(newMsg) // 그리고 응답은 업데이트된 메시지만 보내면 될겁니다.
        }
    },
    { // UPDATE MESSAGE
        method: 'put',
        route: '/messages/:id',
        handler: (req, res) => {
            // const msgs = readDB('messages') // 이거는 똑같이 다 들어갑니다.
            const msgs = getMsgs();
            res.send()
        }
    },
    { // DELETE MESSAGE
        method: 'delete',
        route: '/messages/:id',
        handler: (req, res) => {
            // const msgs = readDB('messages') // 이거는 똑같이 다 들어갑니다.
            const msgs = getMsgs();
            res.send()
        }
    },
]

export default messagesRoute
UPDATE
UPDATE도 만들어보겠습니다.
// server/src/routes/messages.js
import {v4} from "uuid";
import {readDB, writeDB} from "../dbController.js";

const getMsgs = () => readDB('messages') // 중복을 방지하기위한 코드입니다.
const setMsgs = data => writeDB('messages', data) // 중복을 방지하기위한 코드입니다.
const messagesRoute = [
    { // GET MESSAGES : 전체 메시지를 가져오는 명령
        method: 'get',
        route: '/messages',
        handler: (req, res) => {
            // const msgs = readDB('messages') // 이거는 똑같이 다 들어갑니다. 다 똑같으니까 이거를 함수로 바꿔봅시다.
            const msgs = getMsgs();
            res.send(msgs)
        }
    },
    { // CREATE MESSAGE
        method: 'post',
        route: '/messages',
        // POST는 새글을 등록하는겁니다.
        // 첫번째(request) 인자에는 body, params, query가 있습니다. 그 중에서 body를 사용하게됩니다.
        // body는 새글이 등록된 text가 들어있을거고 그리고 userId도 들어있습니다.
        handler: ({body}, res) => {
            // const msgs = readDB('messages') // 이거는 똑같이 다 들어갑니다.
            const msgs = getMsgs();
            const newMsg = {
                id: v4(), // uuid의 v4 버전의 id를 만들겠다는 뜻입니다.
                text: body.text,
                userId: body.userId,
                timestamp: Date.now(),
            }
            msgs.unshift(newMsg) // 새글을 배열의 제일 앞에 넣어줍니다.
            // writeDB('messages', msgs) // 그리고 DB에 기록합니다. // 이 코드도 자주 사용하므로 위에 함수로 뺍니다.
            setMsgs();
            res.send(newMsg) // 그리고 응답은 업데이트된 메시지만 보내면 될겁니다.
        }
    },
    { // UPDATE MESSAGE
        method: 'put',
        route: '/messages/:id', // <- UPDATE는 이렇게 실제 id를 지정해서 요청을 보내는겁니다.
        // UPDATE는 body에 변경된 text가 들어올거고 params 안에 id가 들어오게됩니다.
        // 이런 부분은 여러분들이 첫번째 인자(request)를 콘솔에 출력해보시면 확인하실 수 있으실겁니다.
        handler: ({body, params: {id}}, res) => {
            // UPDATE 요청은 위의 :id로 실제 id로 요청을 보내는거다보니까 클라이언트에선 id가 나와있는데,
            // 실제 서버에선 없는 경우, 혹은 그 반대인 경우,
            // 이런식으로 서버와 클라이언트간 싱크가 맞지 않아서 오류가날 가능성이 없진 않을겁니다.
            // 그래서 그런 경우에 대한 안전대비책을 해놓고 가겠습니다.
            try {
                // const msgs = readDB('messages') // 이거는 똑같이 다 들어갑니다.
                const msgs = getMsgs();
                const targetIndex = msgs.findIndex(msg => msg.id === id) // targetIndex 찾는 방법은 똑같습니다.
                if (targetIndex < 0) throw '메시지가 없습니다.'
                if (msgs[targetIndex].userId !== body.userId) throw '사용자가 다릅니다.'

                const newMsg = {
                    ...msgs[targetIndex], // 기존내용을 다 담고
                    text: body.text, // text만 새로 담으면됩니다.
                }
                msgs.splice(targetIndex, 1, newMsg)
                setMsgs(msgs)
                res.send(newMsg) // 새로 변경된 메시지를 send
            } catch (err) {
                res.status(500).send({error: err}) // error가 날 경우 status를 500으로 지정하고 err 메시지를 띄웁니다.
            }
        }
    },
    { // DELETE MESSAGE
        method: 'delete',
        route: '/messages/:id',
        handler: (req, res) => {
            // const msgs = readDB('messages') // 이거는 똑같이 다 들어갑니다.
            const msgs = getMsgs();
            res.send()
        }
    },
]

export default messagesRoute
DELETE
DELETE도 구현해보겠습니다.
DELETE 부분은 UPDATE와 비슷합니다.
// server/src/routes/messages.js
import {v4} from "uuid";
import {readDB, writeDB} from "../dbController.js";

const getMsgs = () => readDB('messages') // 중복을 방지하기위한 코드입니다.
const setMsgs = data => writeDB('messages', data) // 중복을 방지하기위한 코드입니다.
const messagesRoute = [
    { // GET MESSAGES : 전체 메시지를 가져오는 명령
        method: 'get',
        route: '/messages',
        handler: (req, res) => {
            // const msgs = readDB('messages') // 이거는 똑같이 다 들어갑니다. 다 똑같으니까 이거를 함수로 바꿔봅시다.
            const msgs = getMsgs();
            res.send(msgs)
        }
    },
    { // CREATE MESSAGE
        method: 'post',
        route: '/messages',
        // POST는 새글을 등록하는겁니다.
        // 첫번째(request) 인자에는 body, params, query가 있습니다. 그 중에서 body를 사용하게됩니다.
        // body는 새글이 등록된 text가 들어있을거고 그리고 userId도 들어있습니다.
        handler: ({body}, res) => {
            // const msgs = readDB('messages') // 이거는 똑같이 다 들어갑니다.
            const msgs = getMsgs();
            const newMsg = {
                id: v4(), // uuid의 v4 버전의 id를 만들겠다는 뜻입니다.
                text: body.text,
                userId: body.userId,
                timestamp: Date.now(),
            }
            msgs.unshift(newMsg) // 새글을 배열의 제일 앞에 넣어줍니다.
            // writeDB('messages', msgs) // 그리고 DB에 기록합니다. // 이 코드도 자주 사용하므로 위에 함수로 뺍니다.
            setMsgs();
            res.send(newMsg) // 그리고 응답은 업데이트된 메시지만 보내면 될겁니다.
        }
    },
    { // UPDATE MESSAGE
        method: 'put',
        route: '/messages/:id', // <- UPDATE는 이렇게 실제 id를 지정해서 요청을 보내는겁니다.
        // UPDATE는 body에 변경된 text가 들어올거고 params 안에 id가 들어오게됩니다.
        // 이런 부분은 여러분들이 첫번째 인자(request)를 콘솔에 출력해보시면 확인하실 수 있으실겁니다.
        handler: ({body, params: {id}}, res) => {
            // UPDATE 요청은 위의 :id로 실제 id로 요청을 보내는거다보니까 클라이언트에선 id가 나와있는데,
            // 실제 서버에선 없는 경우, 혹은 그 반대인 경우,
            // 이런식으로 서버와 클라이언트간 싱크가 맞지 않아서 오류가날 가능성이 없진 않을겁니다.
            // 그래서 그런 경우에 대한 안전대비책을 해놓고 가겠습니다.
            try {
                // const msgs = readDB('messages') // 이거는 똑같이 다 들어갑니다.
                const msgs = getMsgs();
                const targetIndex = msgs.findIndex(msg => msg.id === id) // targetIndex 찾는 방법은 똑같습니다.
                if (targetIndex < 0) throw '메시지가 없습니다.'
                if (msgs[targetIndex].userId !== body.userId) throw '사용자가 다릅니다.'

                const newMsg = {
                    ...msgs[targetIndex], // 기존내용을 다 담고
                    text: body.text, // text만 새로 담으면됩니다.
                }
                msgs.splice(targetIndex, 1, newMsg)
                setMsgs(msgs)
                res.send(newMsg) // 새로 변경된 메시지를 send
            } catch (err) {
                res.status(500).send({error: err}) // error가 날 경우 status를 500으로 지정하고 err 메시지를 띄웁니다.
            }
        }
    },
    { // DELETE MESSAGE
        method: 'delete',
        route: '/messages/:id',
        handler: ({body, params: {id}}, res) => {
            try {
                const msgs = getMsgs();
                const targetIndex = msgs.findIndex(msg => msg.id === id)
                if (targetIndex < 0) throw '메시지가 없습니다.'
                if (msgs[targetIndex].userId !== body.userId) throw '사용자가 다릅니다.'

                msgs.splice(targetIndex, 1)
                res.send(id) // DELETE 성공했을 때, id만 넘겨주면될겁니다. 이 id가 지워졌어요 라는 메시지를 던져주는겁니다.
            } catch (err) {
                res.status(500).send({error: err}) // 실패하였을 땐 에러메시지를 던져줍니다.
            }
        }
    },
]

export default messagesRoute
GET에 대해서 하나만 더 보겠습니다
// server/src/routes/messages.js
import {v4} from "uuid";
import {readDB, writeDB} from "../dbController.js";

const getMsgs = () => readDB('messages') // 중복을 방지하기위한 코드입니다.
const setMsgs = data => writeDB('messages', data) // 중복을 방지하기위한 코드입니다.
const messagesRoute = [
    { // GET MESSAGES : 전체 메시지를 가져오는 명령
        method: 'get',
        route: '/messages',
        handler: (req, res) => {
            // const msgs = readDB('messages') // 이거는 똑같이 다 들어갑니다. 다 똑같으니까 이거를 함수로 바꿔봅시다.
            const msgs = getMsgs();
            res.send(msgs)
        }
    },
    { // GET MESSAGE : id 하나에 대한 메시지를 가져오는 것도 살펴봅시다.
        method: 'get',
        route: '/messages/:id',
        handler: ({params: {id}, res}) => { // id를 직접 받아오기 때문에 에러가날 가능성이 있으므로 여기도 마찬가지로 에러 처리를 해줍니다.
            try {
                const msgs = getMsgs();
                const msg = msgs.find(m => m.id === id) // 이번엔 findIndex 메소드가 아니라 find 메소드를 사용합니다.
                if (!msg) throw Error('not found')
                res.send(msg) // msg를 send해줍니다.
            } catch (err) {
                res.status(404).send({ error: err })
            }
        }
    },
    { // CREATE MESSAGE
        method: 'post',
        route: '/messages',
        // POST는 새글을 등록하는겁니다.
        // 첫번째(request) 인자에는 body, params, query가 있습니다. 그 중에서 body를 사용하게됩니다.
        // body는 새글이 등록된 text가 들어있을거고 그리고 userId도 들어있습니다.
        handler: ({body}, res) => {
            // const msgs = readDB('messages') // 이거는 똑같이 다 들어갑니다.
            const msgs = getMsgs();
            const newMsg = {
                id: v4(), // uuid의 v4 버전의 id를 만들겠다는 뜻입니다.
                text: body.text,
                userId: body.userId,
                timestamp: Date.now(),
            }
            msgs.unshift(newMsg) // 새글을 배열의 제일 앞에 넣어줍니다.
            // writeDB('messages', msgs) // 그리고 DB에 기록합니다. // 이 코드도 자주 사용하므로 위에 함수로 뺍니다.
            setMsgs();
            res.send(newMsg) // 그리고 응답은 업데이트된 메시지만 보내면 될겁니다.
        }
    },
    { // UPDATE MESSAGE
        method: 'put',
        route: '/messages/:id', // <- UPDATE는 이렇게 실제 id를 지정해서 요청을 보내는겁니다.
        // UPDATE는 body에 변경된 text가 들어올거고 params 안에 id가 들어오게됩니다.
        // 이런 부분은 여러분들이 첫번째 인자(request)를 콘솔에 출력해보시면 확인하실 수 있으실겁니다.
        handler: ({body, params: {id}}, res) => {
            // UPDATE 요청은 위의 :id로 실제 id로 요청을 보내는거다보니까 클라이언트에선 id가 나와있는데,
            // 실제 서버에선 없는 경우, 혹은 그 반대인 경우,
            // 이런식으로 서버와 클라이언트간 싱크가 맞지 않아서 오류가날 가능성이 없진 않을겁니다.
            // 그래서 그런 경우에 대한 안전대비책을 해놓고 가겠습니다.
            try {
                // const msgs = readDB('messages') // 이거는 똑같이 다 들어갑니다.
                const msgs = getMsgs();
                const targetIndex = msgs.findIndex(msg => msg.id === id) // targetIndex 찾는 방법은 똑같습니다.
                if (targetIndex < 0) throw '메시지가 없습니다.'
                if (msgs[targetIndex].userId !== body.userId) throw '사용자가 다릅니다.'

                const newMsg = {
                    ...msgs[targetIndex], // 기존내용을 다 담고
                    text: body.text, // text만 새로 담으면됩니다.
                }
                msgs.splice(targetIndex, 1, newMsg)
                setMsgs(msgs)
                res.send(newMsg) // 새로 변경된 메시지를 send
            } catch (err) {
                res.status(500).send({error: err}) // error가 날 경우 status를 500으로 지정하고 err 메시지를 띄웁니다.
            }
        }
    },
    { // DELETE MESSAGE
        method: 'delete',
        route: '/messages/:id',
        handler: ({body, params: {id}}, res) => {
            try {
                const msgs = getMsgs();
                const targetIndex = msgs.findIndex(msg => msg.id === id)
                if (targetIndex < 0) throw '메시지가 없습니다.'
                if (msgs[targetIndex].userId !== body.userId) throw '사용자가 다릅니다.'

                msgs.splice(targetIndex, 1)
                res.send(id) // DELETE 성공했을 때, id만 넘겨주면될겁니다. 이 id가 지워졌어요 라는 메시지를 던져주는겁니다.
            } catch (err) {
                res.status(500).send({error: err}) // 실패하였을 땐 에러메시지를 던져줍니다.
            }
        }
    },
]

export default messagesRoute
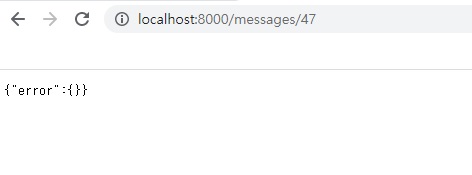
흐음 위와 같이 url 요청을 보내면 보여져야하는데 왜 안보일까요.
JSON 형태의 파일을 stringify를 했다가 다시 parse할 때의 문제점은 숫자형은 숫자형으로 변환을 한다는겁니다.
그런데
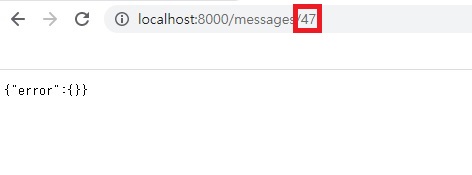
url상에서 들어오는 위 47이란 데이터는 숫자형이아니라 문자열입니다.
그래서 그것이 맞지않기 때문에 찾질못해서 에러가 나는겁니다.
그래서 server/src/db/messages.json의 id 값을 전부 문자열로 바꾸는 작업이 필요합니다.
[
  {
    "id": "50",
    "userId": "jay",
    "timestamp": 1234570890123,
    "text": "50 mock text"
  },
  {
    "id": "49",
    "userId": "jay",
    "timestamp": 1234570830123,
    "text": "49 mock text"
  },
  {
    "id": "48",
    "userId": "jay",
    "timestamp": 1234570770123,
    "text": "48 mock text"
  },
  {
    "id": "47",
    "userId": "jay",
    "timestamp": 1234570710123,
    "text": "47 mock text"
  },
  {
    "id": "46",
    "userId": "jay",
    "timestamp": 1234570650123,
    "text": "46 mock text"
  },
  {
    "id": "45",
    "userId": "roy",
    "timestamp": 1234570590123,
    "text": "45 mock text"
  },
  {
    "id": "44",
    "userId": "roy",
    "timestamp": 1234570530123,
    "text": "44 mock text"
  },
  {
    "id": "43",
    "userId": "jay",
    "timestamp": 1234570470123,
    "text": "43 mock text"
  },
  {
    "id": "42",
    "userId": "jay",
    "timestamp": 1234570410123,
    "text": "42 mock text"
  },
  {
    "id": "41",
    "userId": "jay",
    "timestamp": 1234570350123,
    "text": "41 mock text"
  },
  {
    "id": "40",
    "userId": "roy",
    "timestamp": 1234570290123,
    "text": "40 mock text"
  },
  {
    "id": "39",
    "userId": "jay",
    "timestamp": 1234570230123,
    "text": "39 mock text"
  },
  {
    "id": "38",
    "userId": "roy",
    "timestamp": 1234570170123,
    "text": "38 mock text"
  },
  {
    "id": "37",
    "userId": "roy",
    "timestamp": 1234570110123,
    "text": "37 mock text"
  },
  {
    "id": "36",
    "userId": "jay",
    "timestamp": 1234570050123,
    "text": "36 mock text"
  },
  {
    "id": "35",
    "userId": "roy",
    "timestamp": 1234569990123,
    "text": "35 mock text"
  },
  {
    "id": "34",
    "userId": "roy",
    "timestamp": 1234569930123,
    "text": "34 mock text"
  },
  {
    "id": "33",
    "userId": "roy",
    "timestamp": 1234569870123,
    "text": "33 mock text"
  },
  {
    "id": "32",
    "userId": "jay",
    "timestamp": 1234569810123,
    "text": "32 mock text"
  },
  {
    "id": "31",
    "userId": "jay",
    "timestamp": 1234569750123,
    "text": "31 mock text"
  },
  {
    "id": "30",
    "userId": "roy",
    "timestamp": 1234569690123,
    "text": "30 mock text"
  },
  {
    "id": "29",
    "userId": "roy",
    "timestamp": 1234569630123,
    "text": "29 mock text"
  },
  {
    "id": "28",
    "userId": "roy",
    "timestamp": 1234569570123,
    "text": "28 mock text"
  },
  {
    "id": "27",
    "userId": "jay",
    "timestamp": 1234569510123,
    "text": "27 mock text"
  },
  {
    "id": "26",
    "userId": "roy",
    "timestamp": 1234569450123,
    "text": "26 mock text"
  },
  {
    "id": "25",
    "userId": "jay",
    "timestamp": 1234569390123,
    "text": "25 mock text"
  },
  {
    "id": "24",
    "userId": "roy",
    "timestamp": 1234569330123,
    "text": "24 mock text"
  },
  {
    "id": "23",
    "userId": "jay",
    "timestamp": 1234569270123,
    "text": "23 mock text"
  },
  {
    "id": "22",
    "userId": "roy",
    "timestamp": 1234569210123,
    "text": "22 mock text"
  },
  {
    "id": "21",
    "userId": "roy",
    "timestamp": 1234569150123,
    "text": "21 mock text"
  },
  {
    "id": "20",
    "userId": "roy",
    "timestamp": 1234569090123,
    "text": "20 mock text"
  },
  {
    "id": "19",
    "userId": "roy",
    "timestamp": 1234569030123,
    "text": "19 mock text"
  },
  {
    "id": "18",
    "userId": "roy",
    "timestamp": 1234568970123,
    "text": "18 mock text"
  },
  {
    "id": "17",
    "userId": "roy",
    "timestamp": 1234568910123,
    "text": "17 mock text"
  },
  {
    "id": "16",
    "userId": "roy",
    "timestamp": 1234568850123,
    "text": "16 mock text"
  },
  {
    "id": "15",
    "userId": "jay",
    "timestamp": 1234568790123,
    "text": "15 mock text"
  },
  {
    "id": "14",
    "userId": "roy",
    "timestamp": 1234568730123,
    "text": "14 mock text"
  },
  {
    "id": "13",
    "userId": "jay",
    "timestamp": 1234568670123,
    "text": "13 mock text"
  },
  {
    "id": "12",
    "userId": "roy",
    "timestamp": 1234568610123,
    "text": "12 mock text"
  },
  {
    "id": "11",
    "userId": "jay",
    "timestamp": 1234568550123,
    "text": "11 mock text"
  },
  {
    "id": "10",
    "userId": "jay",
    "timestamp": 1234568490123,
    "text": "10 mock text"
  },
  {
    "id": "9",
    "userId": "roy",
    "timestamp": 1234568430123,
    "text": "9 mock text"
  },
  {
    "id": "8",
    "userId": "roy",
    "timestamp": 1234568370123,
    "text": "8 mock text"
  },
  {
    "id": "7",
    "userId": "roy",
    "timestamp": 1234568310123,
    "text": "7 mock text"
  },
  {
    "id": "6",
    "userId": "jay",
    "timestamp": 1234568250123,
    "text": "6 mock text"
  },
  {
    "id": "5",
    "userId": "roy",
    "timestamp": 1234568190123,
    "text": "5 mock text"
  },
  {
    "id": "4",
    "userId": "jay",
    "timestamp": 1234568130123,
    "text": "4 mock text"
  },
  {
    "id": "3",
    "userId": "roy",
    "timestamp": 1234568070123,
    "text": "3 mock text"
  },
  {
    "id": "2",
    "userId": "jay",
    "timestamp": 1234568010123,
    "text": "2 mock text"
  },
  {
    "id": "1",
    "userId": "roy",
    "timestamp": 1234567950123,
    "text": "1 mock text"
  }
]
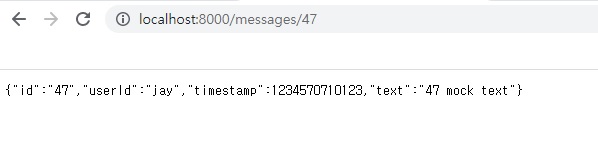
이렇게 메시지 하나에 대해서도 접근이 가능해졌습니다.
그밖의 확인은 postman을 사용해서 직접 확인해보셔도되지만, postman을 사용 안하셔도 이젠 직접 프론트엔드에서 확인이 가능합니다.
나머지 API 부분들은 조금 이따 보도록 하겠습니다.
routes - users.js
routes에 users.js도 만들어보겠습니다.
user 정보를 아직 클라이언트에서 구현은 안했지만 만들어보도록 하겠습니다.
user는 많이 하지말고 정보를 가져오는 것 정도만 구현해보겠습니다.
user.json은 아래와같이 users.json으로 이름을 변경해줍시다. (파일이름 잘못줌..)
root_folder/
|-- client/
|   |-- components/
|       `-- MsgInput.js
|       `-- MsgItem.js
|       `-- MsgList.js
|   |-- pages/
|       `-- _app.js
|       `-- index.js
|       `-- index.scss
|   `-- next.config.js
|   `-- package.json
|-- server/
|   |-- src/
|       |-- db/
|           `-- messages.json
|           `-- users.json
|       |-- routes/
|           `-- messages.js
|           `-- users.js
|       `-- dbController.js
|       `-- index.js
|   `-- nodemon.json
|   `-- package.json
|-- package.json
// server/src/routes/users.js
import {readDB} from "../dbController.js";
const getUsers = () => readDB('users')
const usersRoute = [
{
method: 'get',
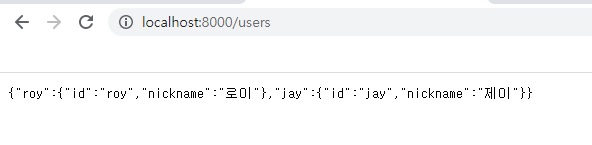
route: '/users',
handler: (req, res) => {
const users = getUsers();
res.send(users)
}
},
{
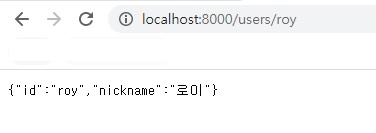
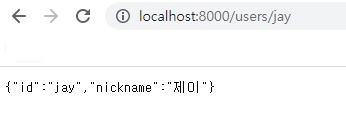
method: 'get',
route: '/users/:id',
handler: ({params: {id}}, res) => {
try {
const users = getUsers()
const user = users[id]
if (!user) throw Error('사용자가 없습니다.')
res.send(user)
} catch (err) {
res.status(500).send({errer: err})
}
}
}
]
export default usersRoute
// server/src/index.js
import express from 'express'
import cors from 'cors'
import messagesRoute from "./routes/messages.js";
import usersRoute from "./routes/users.js";

const app = express();
app.use(express.urlencoded({extended: true}))
app.use(express.json()) // express에서 json 형태로 사용하겠다.
app.use(cors({
    origin: 'http://localhost:3000', // 클라이언트 서버
    credentials: true,
}))

const routes = [...messagesRoute, ...usersRoute]
routes.forEach(({method, route, handler}) => {
    app[method](route, handler)
})

// 서버 경로는 8000번
app.listen(8000, () => {
    console.log('server listening on 8000...')
})
서버쪽 작업은 끝입니다.
이제 클라이언트쪽 작업을 해보도록 하겠습니다.