
5 간단하게 페이지 띄워보기 - GraphQL Query 알아보기
source: categories/study/gatsby/gatsby_5.md
GraphQL에서의 Query는 어떻게 사용할까?
GraphQL은 REST API에서는 찾을 수 없는 매력적인 특징을 가지고 있습니다.
바로 필요한 데이터만 받아올 수 있다는 것인데요, 다음과 같이 사용할 수 있습니다.
query getPeopleList {
  allPeople {
    edges {
      node {
        id
        name
      }
    }
  }
}
// Query 결과 반환 값

{
  "data": {
    "allPeople": {
      "edges": [
        {
          "node": {
            "id": "cGVvcGxlOjE=",
            "name": "Luke Skywalker"
          }
        },
        {
          "node": {
            "id": "cGVvcGxlOjQ=",
            "name": "Darth Vader"
          }
        },
        {
          "node": {
            "id": "cGVvcGxlOjU=",
            "name": "Leia Organa"
          }
        }
      ]
    }
  }
}
위의 예시는 모든 유저들의 id값과 이름만 가져오도록 정의한 getPeopleList Query의 사용 예시입니다.
예시와 같이 Query를 정의하고, 이를 호출해 원하는 데이터를 얻을 수 있는 것입니다.
GraphQL의 강력한 기능 중 하나인 GraphiQL
Gatsby에서는 홈페이지의 메타데이터, 마크다운 관련 데이터, 이미지 데이터 등을 Query를 통해 얻어올 수 있습니다.
GraphQL은 기본적으로 GraphiQL이라는 IDE를 제공하는데, 이를 통해 어떤 데이터를 요청할 수 있는지 알 수 있을 뿐더러 쿼리 요청 전에 잠재적인 에러를 알려줄 수 있는 강력한 기능을 제공합니다.
You can now view gatsby-starter-default in the browser.
⠀
  <http://localhost:8000/>
⠀
View GraphiQL, an in-browser IDE, to explore your site's data and schema
⠀
  <http://localhost:8000/___graphql>
⠀
Note that the development build is not optimized.
To create a production build, use gatsby build
로컬 서버 실행 시, 나타나는 결과창에서 링크가 두 개 보이는데, 아래의 링크가 GraphiQL IDE 링크이므로 IDE에 접속해주세요.
저희는 우선 이 IDE를 통해 사이트의 메타데이터를 요청해보겠습니다.
일반적으로 Gatsby에서 메타데이터는 gatsby-config.js 파일에서 확인할 수 있습니다.
module.exports = {
  siteMetadata: {
    title: `Gatsby Default Starter`,
    description: `Kick off your next, great Gatsby project with this default starter. This barebones starter ships with the main Gatsby configuration files you might need.`,
    author: `@gatsbyjs`,
  },
  // ...
}
해당 부분이 메타데이터인데, 이 데이터를 받아오기 위해서는 다음과 같이 쿼리를 작성하면 됩니다.
query {
  site {
    siteMetadata {
      author
      description
      title
    }
  }
}
그럼 다음과 같이 우측에 결과값이 표시됩니다.
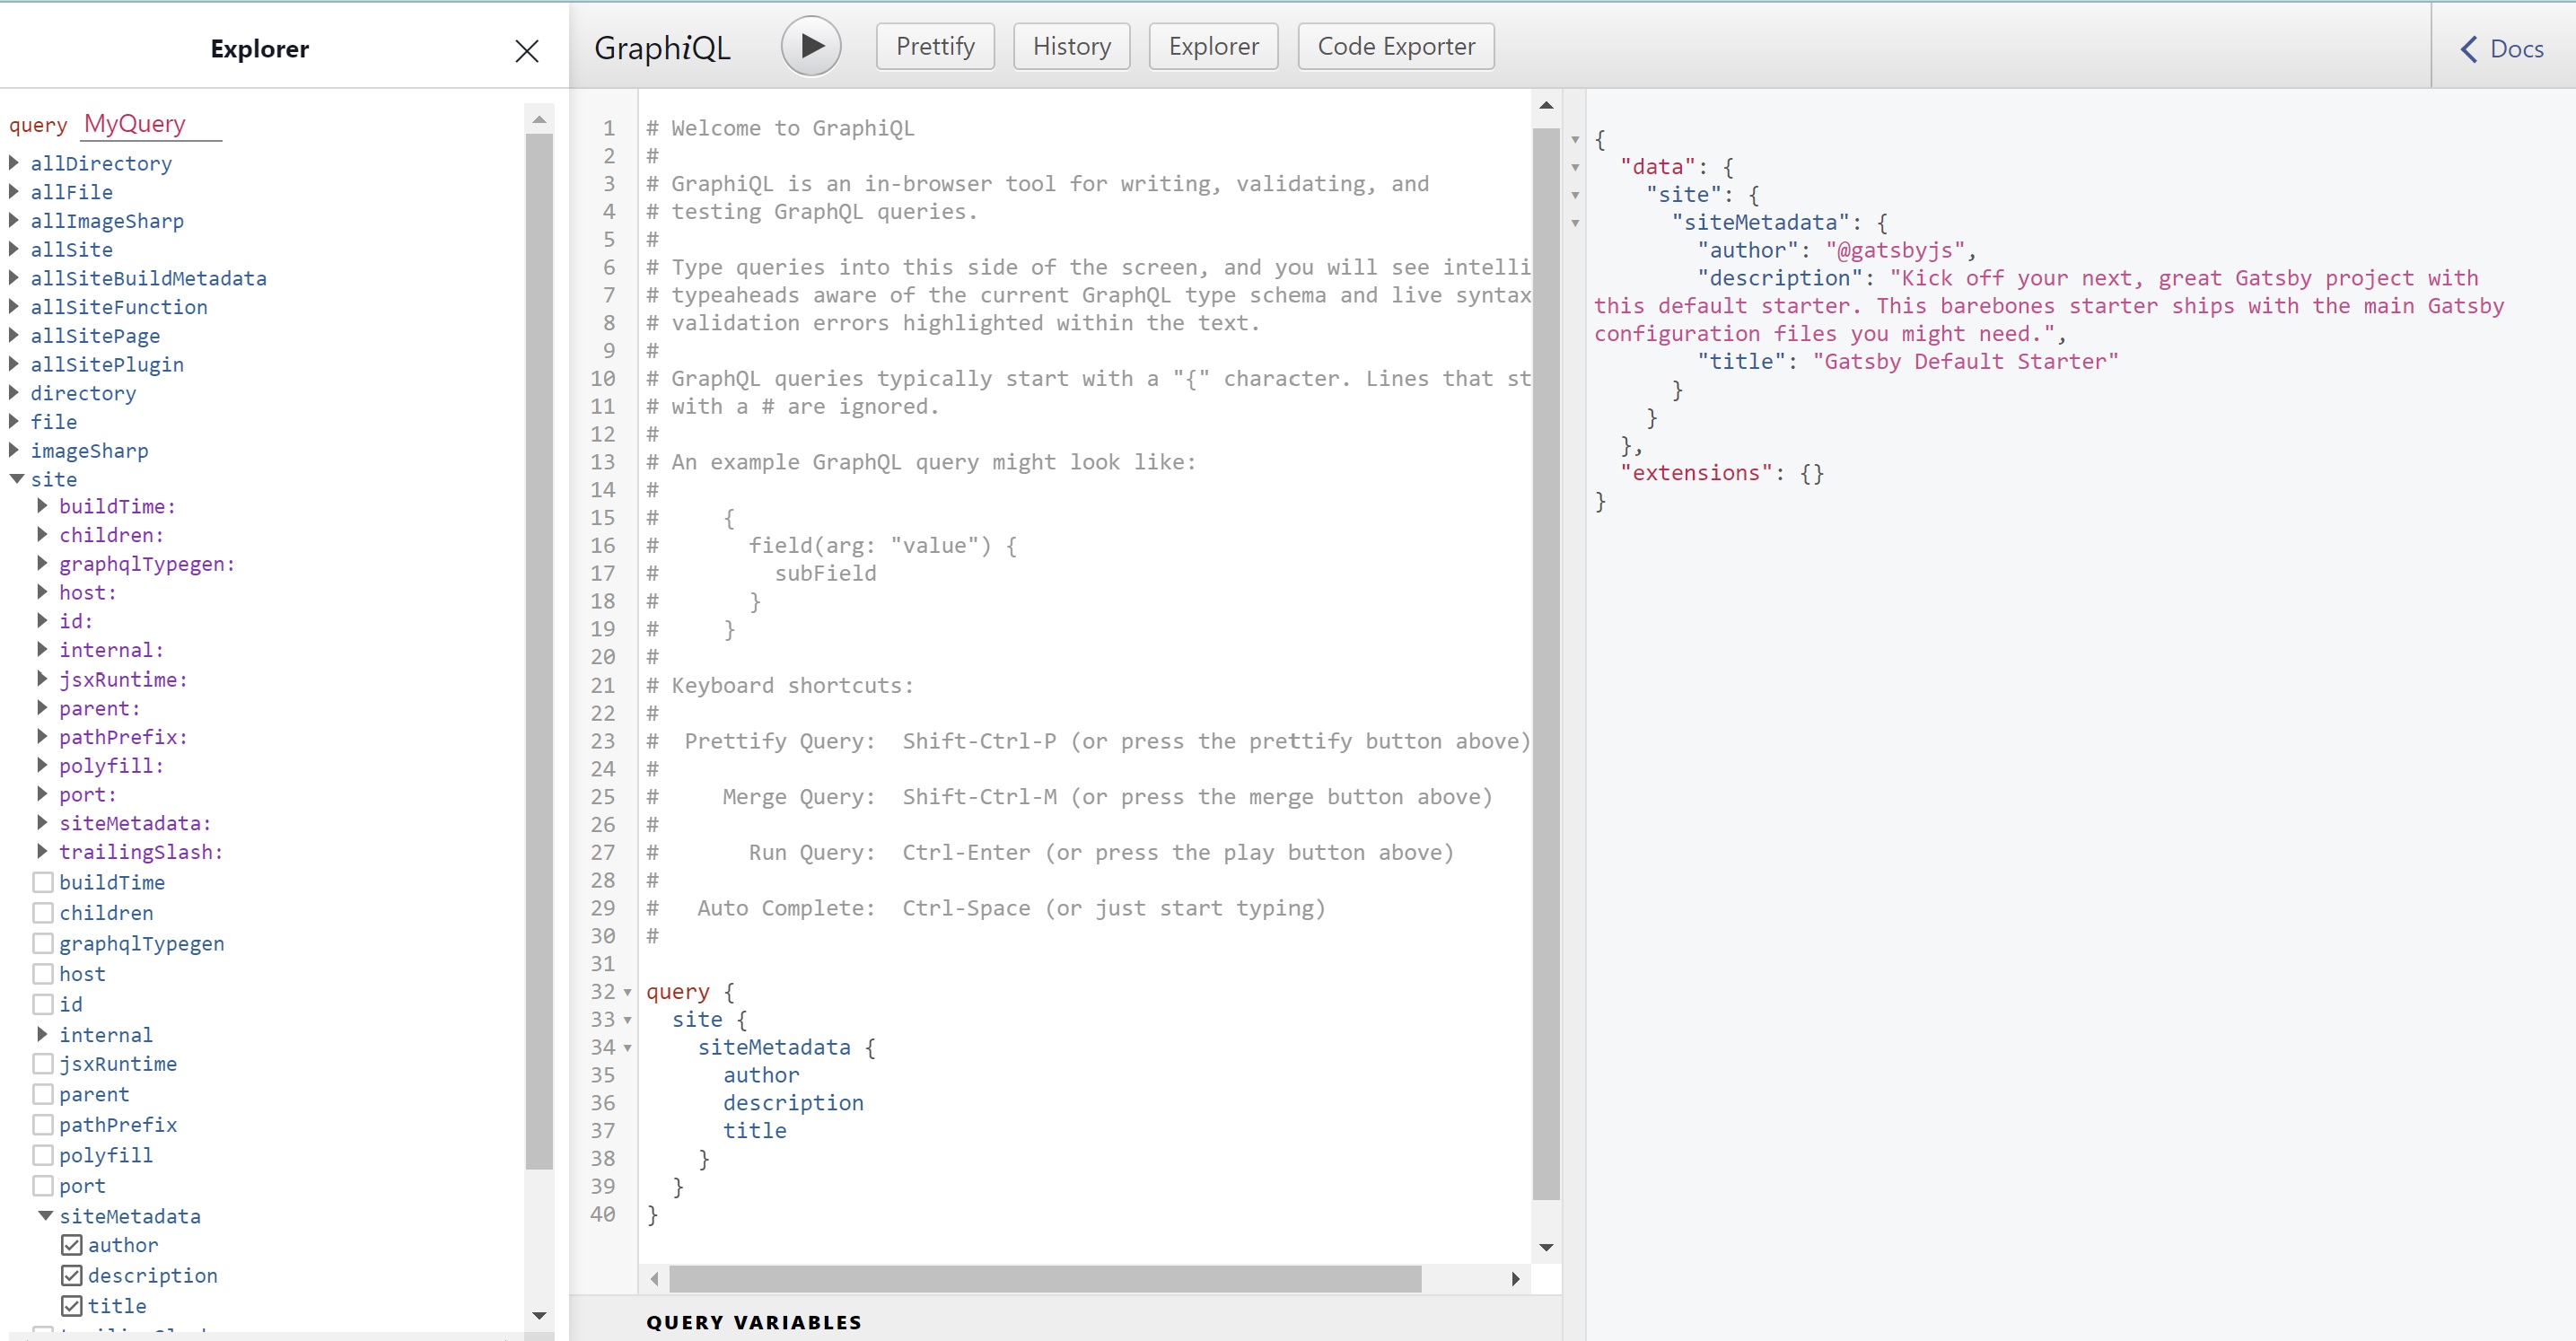
gatsby-config.js 파일에서 정의한 메타데이터 그대로 받아온 것이 보이시나요?
이렇게 query를 작성해 요청하는 과정을 GraphQL IDE를 통해 확인할 수 있습니다.
좌측에는 query 내부에 작성 가능한 타입을 나열해놓은 것으로 ,이것저것 만져보며 확인해보는 것을 추천드립니다.
사용 방법이 그렇게 어렵지 않아 금방 Query에 대해 알 수 있습니다.
Gatsby에서 GraphQL Query은 어떻게 쓸 수 있을까?
이렇게 메타데이터를 요청하는 Query를 작성해보았으니 이제 컴포넌트에서 Query를 요청하는 방법에 대해 알아봅시다.
먼저, src 폴더 내의 pages 폴더에 info.tsx 파일을 생성해줍시다.
그리고 다음과 같이 코드 구조를 잡아줍시다.
src/pages/info.tsx
import React, { FunctionComponent } from 'react'
import { graphql } from 'gatsby'
import Text from 'components/Text'

type InfoPageProps = {}

const InfoPage: FunctionComponent<InfoPageProps> = function () {
  return (
    <div>
      <Text text="Hello" />
    </div>
  )
}

export default InfoPage
가장 먼저 해줄 것은 Query를 정의하는 것입니다.
Gatsby에서는 기본적으로
- pages 폴더 내부의 파일과
- Gatsby API를 통해 생성해주는 페이지의 템플릿 파일에서만
Query 정의가 가능합니다.
저희는 위에서 작성한 메타데이터를 요청하는 Query를 그대로 사용하겠습니다.
pages 폴더 내부에 있는 컴포넌트에서는 다음과 같이 Query를 정의하고 요청할 수 있습니다.
src/pages/info.tsx
import React, { FunctionComponent } from 'react'
import { graphql } from 'gatsby'
import Text from 'components/Text'

type InfoPageProps = {}

const InfoPage: FunctionComponent<InfoPageProps> = function () {
  return (
    <div>
      <Text text="Hello" />
    </div>
  )
}

export default InfoPage

export const metadataQuery = graphql`
  {
    site {
      siteMetadata {
        title
        description
        author
      }
    }
  }
`
아래와 같이 변수에 Query를 담아주고, 이를 Export 해주면 Gatsby 내부적으로 요청을 보냅니다.
그럼 보낸 요청에 대한 응답으로 데이터를 Props를 전달해줍니다.
여기서 어떤 형식으로 데이터가 넘어올까요?
위에서 GraphiQL을 사용해보며 작성했던 Query에 대한 반환 값을 확인해봅시다.
{
  "data": {
    "site": {
      "siteMetadata": {
        "author": "@gatsbyjs",
        "description": "Kick off your next, great Gatsby project with this default starter. This barebones starter ships with the main Gatsby configuration files you might need.",
        "title": "Gatsby Default Starter"
      }
    }
  }
}
data라는 키 값을 제외하면 위에서 정의했던 Query의 형식과 일치합니다.
이는 Props를 받을 때에도 동일합니다.
컴포넌트에서 받는 Props 객체의 data 키 값으로 Query에 대한 결과 값이 저장되어 있습니다.
그럼 다음과 같이 값을 불러와 사용할 수 있는 것이죠.
src/pages/info.tsx
import React, { FunctionComponent } from 'react'
import { graphql } from 'gatsby'
import Text from 'components/Text'

type InfoPageProps = {
  data: {
    site: {
      siteMetadata: {
        title: string
        description: string
        author: string
      }
    }
  }
}

const InfoPage: FunctionComponent<InfoPageProps> = function ({
  data: {
    site: {
      siteMetadata: { title, description, author },
    },
  },
}) {
  return (
    <div>
      <Text text={title} />
      <Text text={description} />
      <Text text={author} />
    </div>
  )
}

export default InfoPage

export const metadataQuery = graphql`
  {
    site {
      siteMetadata {
        title
        description
        author
      }
    }
  }
`;
위에서 확인한 쿼리 반환 결과 값에 따라 Props 타입을 지정해주었으며, Destructuring Assignment 문법을 활용해 title, description, author 값만 추출해 사용할 수 있습니다.
이렇게 Query를 통해 데이터 형식을 쉽게 파악할 수 있기 때문에 Props 타입 정의도 엄청 간편합니다.
여기까지 하고 http://localhost:8000/info 링크에 접속해봅시다.
Gatsby Default Starter
Kick off your next, great Gatsby project with this default starter. This barebones starter ships with the main Gatsby configuration files you might need.
@gatsbyjs
화면에 다음과 같은 메타데이터가 잘 뜨는지 확인해주세요.