
2021-06
source: categories/daily-issue/issue1.md
6월 18일
jQuery - 체크박스와 라디오 박스 체크상태 체크 후 텍스트 input readonly 활성 비활성
-
오랜만에 jQuery 사용(체크박스와 라디오 박스 체크상태 체크 후 텍스트 input readonly 활성 비활성)
-
체크포인트:
change이벤트, jQuery의.attr()메소드와.prop()메소드 차이는?(function () { var chkBox = $('.etc .chk_box input'); var radioBox = $('.radio_box input'); chkBox.on('change', function (e) { var target = $(e.target); var targetParents = target.parents('.inline_box'); var targetParentsEtc = targetParents.find('.etc_txt'); if (target.is(':checked')) { targetParentsEtc.attr('readonly', false); } else { targetParentsEtc.val('').attr('readonly', true); } }) radioBox.on('change', function () { var etcRadio =$('.etc1 .radio_box input'); var etcRadioParents = etcRadio.parents('.inline_box'); var etcRadioParentsInput = etcRadioParents.find('.etc_txt1'); if (etcRadio.is(':checked')) { etcRadioParentsInput.attr('readonly', false); } else { etcRadioParentsInput.val('').attr('readonly', true); } }) })()
-
6월 30일
git ssh 키 생성 및 적용
-
git ssh 키 생성 및 적용
git clone, pull, push가 갑자기 안됨. git 계정과 비밀번호를 맞게 입력해도 안됨.
찾아보니 2중 보안..? 그런데 이상함. 집 PC는 잘 되는데, 노트북과 맥북에서 갑자기 안됨..
여튼 계정 정보가 등록되었다고 해서 이게 "나다!"라는 보증이 없다고 함. 이 보증을 위해 SSH 공개키로 인증을 해야된다고함.
-
mac OS - git bash
 1. cat ~/.ssh/id_rsa.pub  <- ssh 공개키 있는지없는지 확인. 없다면 2번 명령어로..
 2. ssh-keygen <- ssh 공개키 생성. 여기서 뭐 입력하는 부분이 나오는데 전부 Enter 키를 눌러주면됨.
 3. cat ~/.ssh/id_rsa.pub <- 그리고 다시 확인. ssh 공개키가 뜨는 것을 확인할 수 있다.
위와 같이 생성 후 github에 ssh 키 등록하기
github 자신의 프로필 -> setting -> SSH and GPG keys -> New SSH key -> key 이름과 key 값 설정여기까지 진행하면 git 명령어로 git clone, pull, push 등을 할 수 있음.
맨 처음에 사용할 때는 정보를 요구할 수도 있음 (github 아이디, 비밀번호)
하지만 가장 처음만 진행하고 그 이후에는 어떤 요구사항도 없이 바로바로 할 수 있음을 확인할 수 있음. -
Window OS - git bash
 1. cat ~/.ssh/id_rsa.pub <- ssh 공개키 있는지없는지 확인. 없다면 2번 명령어로..
 2. ssh-keygen <- ssh 공개키 생성. 여기서 뭐 입력하는 부분이 나오는데 전부 Enter 키를 눌러주면됨.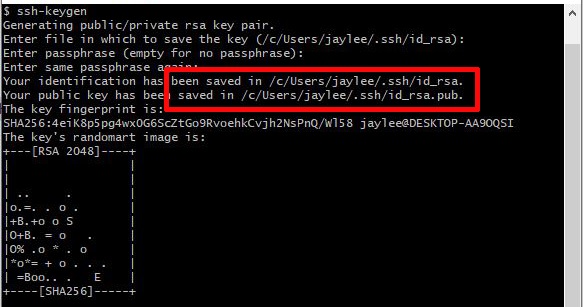
어디에 저장이 되었는지 확인해줍니다.
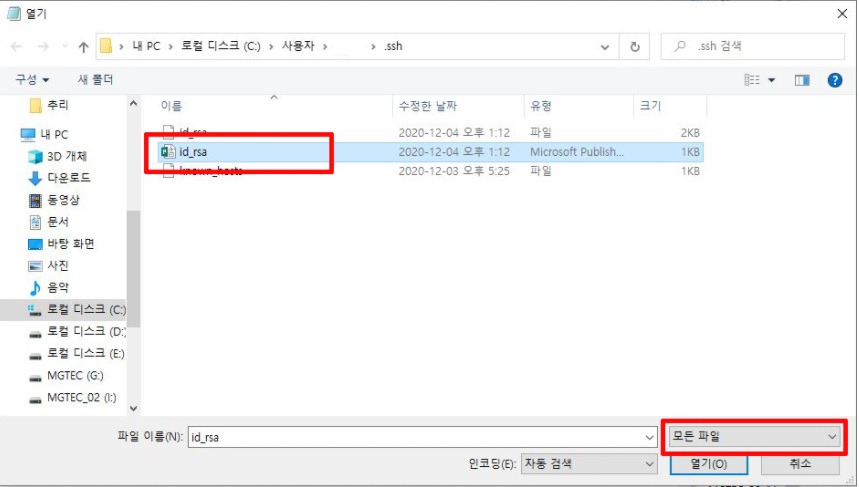
메모장으로 해당 파일을 열어줍니다. 이 때 ‘모든파일'로 지정해준 뒤 앞에 아이콘이 있는 파일을 선택합니다.

생성한 ssh 키를 모두 복사해줍니다.
git hub에 로그인하셔서 상단 우측 자신의 프로필 클릭 > settings, SSH & GPG keys > new SSH key > title에 해당 기기 이름 적은 후 (ex_ home or macbook 등등…) 아까 복사한 모든 코드를 복붙해줍니다.
async/await 실행순서
async/await실행순서
const fs = require('fs/promises');
const constants = require('fs').constants;
const path = require('path');

(async () => {
    // await
    await fs.access(path.join(__dirname, 'dist/'), constants.F_OK | constants.W_OK | constants.R_OK) // 폴더 있는지 없는지 확인
        .then(() => {
            console.log('실행0')
        })
        .catch(async () => {
            await fs.mkdir(path.join(__dirname, 'dist/'));
        })

    // await
    await fs.access(path.join(__dirname, 'dist/ftl'), constants.F_OK | constants.W_OK | constants.R_OK) // 폴더 있는지 없는지 확인
        .then(() => {
            console.log('실행1')
        })
        .catch(async () => {
            await fs.mkdir(path.join(__dirname, 'dist/ftl'));
        })

    // await
    await fs.access(path.join(__dirname, 'dist/ftl/includes'), constants.F_OK | constants.W_OK | constants.R_OK) // 폴더 있는지 없는지 확인
        .then(() => {
            console.log('실행2')
        })
        .catch(async () => {
            await fs.mkdir(path.join(__dirname, 'dist/ftl/includes'));
        })

    console.log('실행3')
})()

// 실행0
// 실행1
// 실행2
// 실행3